

Mini-Terrain System
The Mini-Terrain System is a collection of 3D Printable hex tiles designed for use on the tabletop during role-playing games, or small scale skirmish miniatures battle games. Each of the pieces of the Mini-Terrain System collection are designed for printing on an FDM 3D Printer (in fact our test prints are made on a Creality Ender 3 FDM 3D Printer).
![]() I started this project as a means of teaching myself 3D Modeling in programs such as ZBrush and 3D Studio Max, while also learning about 3D printing on an Ender 3 machine. I still have a lot to learn, but this project has taught me so much about creating 3D models for 3D printing.
I started this project as a means of teaching myself 3D Modeling in programs such as ZBrush and 3D Studio Max, while also learning about 3D printing on an Ender 3 machine. I still have a lot to learn, but this project has taught me so much about creating 3D models for 3D printing.
But this project has come to an end as I have changed my mind about how I want these tiles to function on the tabletop. Thus I have made the STL files free download for anyone who wants to print them. I hope the mini-terrain system brings you a lot of fun.
Plus, who knows… if I get time in the future, I may re-visit the concept and create a second version.
Set Elements
This collection of 3D Printed tabletop terrain is currently in production. Below are descriptions of the elements that have been completed so far.

Add-on Elements
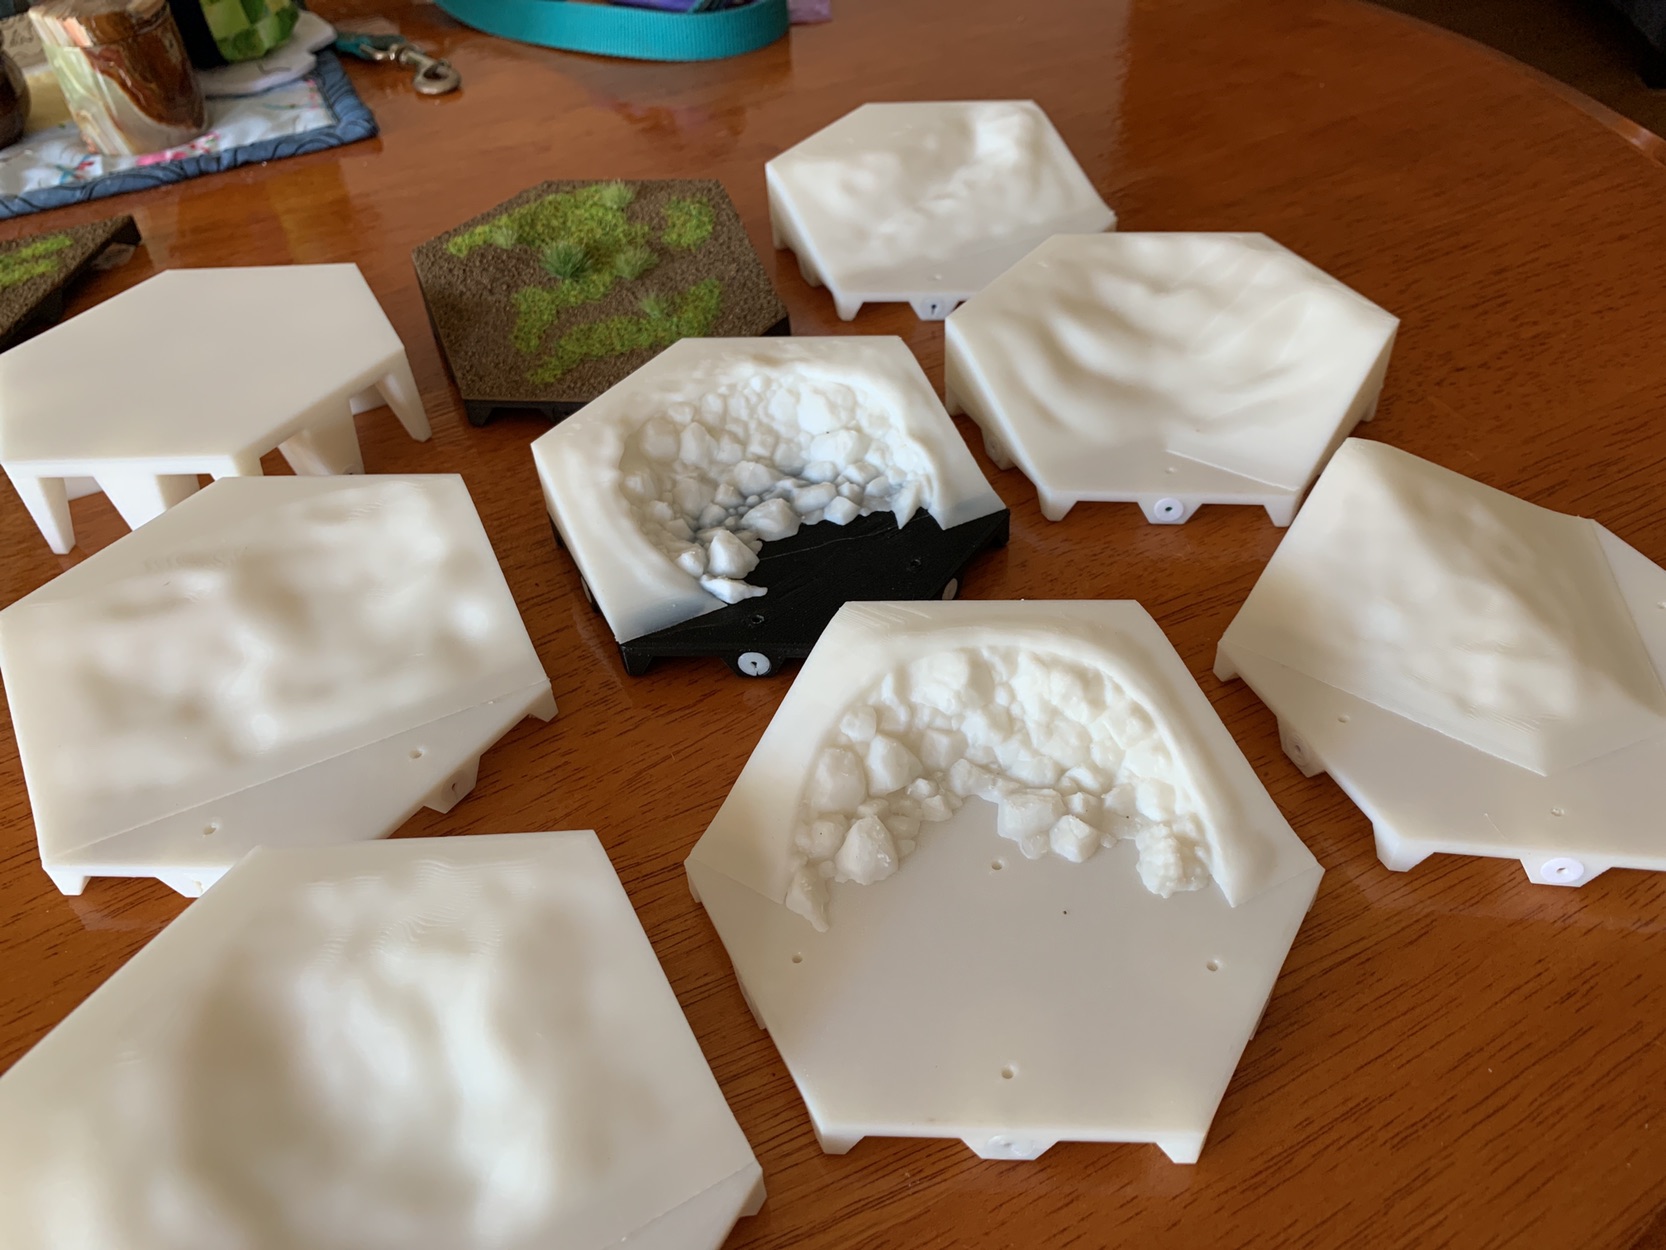
Most of the feature elements are being designed to act as add-on elements that can be attached to the basic hex tile. The add-on elements are aligned to the base hex tile with the use of pins (small lengths of 1.75mm filament).
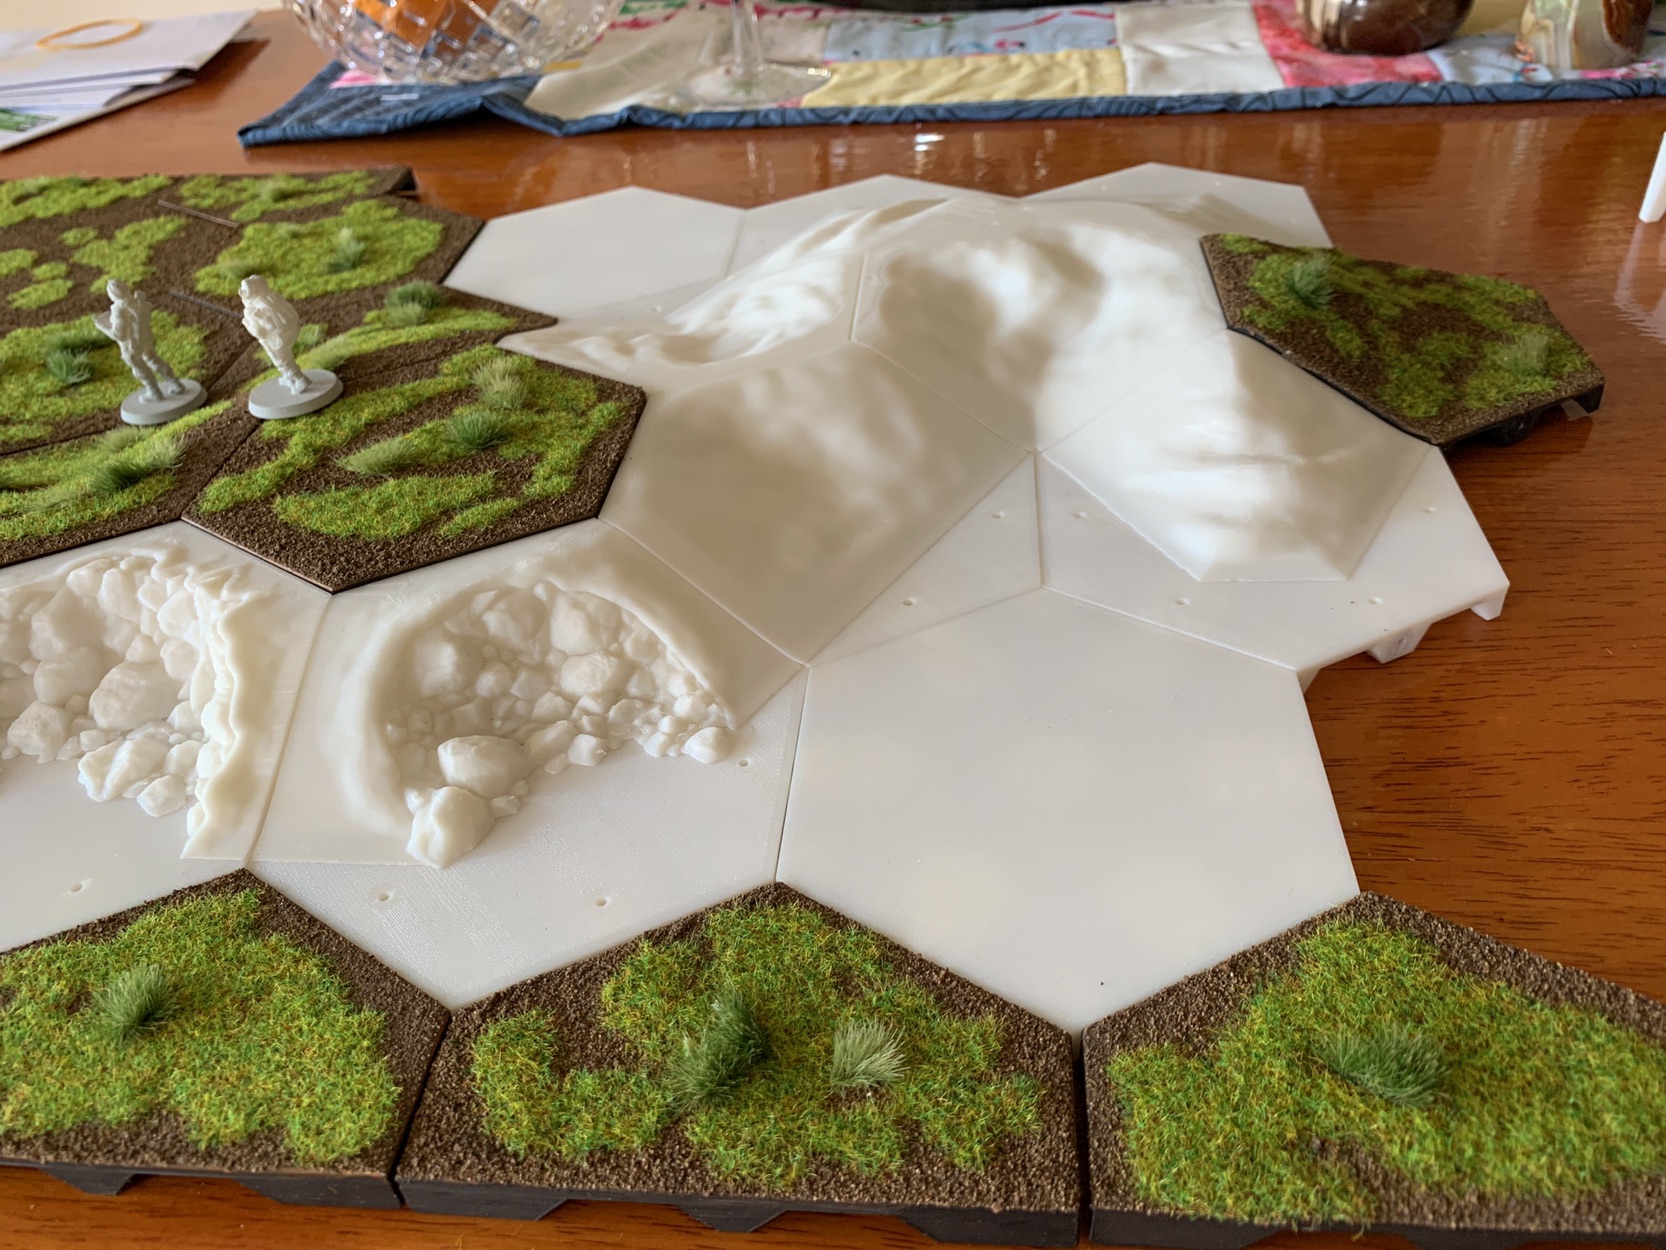
The slope or hill add-on elements are being designed as pieces that will be glued to the top of a basic hex tile. Each element has pin holes in the bottom to align the element with the correct orientation of the basic hex it attaches too.
More complex elements will be a combination of sculpted base hex and sculpted add-on element.
Basic Add-on Elements (eg: Hills and Slopes) are designed to raise the height of the “ground level” to 30mm, with each add-on being 20mm in height.

Basic Hex Tiles
The basic unit of the collection is the basic hex tile. Each of these tiles is 100mm wide and 10mm in height. This gives us plenty of space to sculpt in detail such as roads, river elements, etc. Each of the basic hex tiles includes a socket in each long edge for installing a 5mm ball magnet, which is then capped off with a small plug to keep the magnet in place. The magnet sockets provide the locking force to keep the tiles in place when setup on the tabletop, while also meaning that there are no interlocking clips to worry about when assembling the terrain for a game.
Each of the basic hex tiles includes a series of pin holes in the top surface for aligning add-on elements (which have corresponding pin holes in the base). Use a length of surplus 1.7mm 3D printer filament as pins.
These hex tiles also come in half tile pieces to give assembled game boards a straight edge once assembled.

Half & Quarter Hex Tiles
There are half hex and quartier basic hex tiles for use on the edge on an assembled game board. These half and quarter tiles help to create straight edges to a game board.
These are two half hex shapes, and one quarter tile, which can simply be flipped in the slicer software to provide a quarter facing the other way.

Stream & Bridge
The first prototype bridge and hex tile has been designed and is ready for test printing. The feature consists of a base hex tile and a bridge that is attached to the tile.

Riser/Platform Hex Tiles
These Hex tiles are designed to have a “ground level” of 30mm and fulfill the same role as Basic Hex Tiles but as the upper ground level for the tops of hills.
These hex tiles also come in Half & Quarter tile pieces to give assembled game boards a straight edge once assembled. If for example a hill is on the edge of the game board area.
The ground level can thus be raised higher and higher by simply stock these elements.

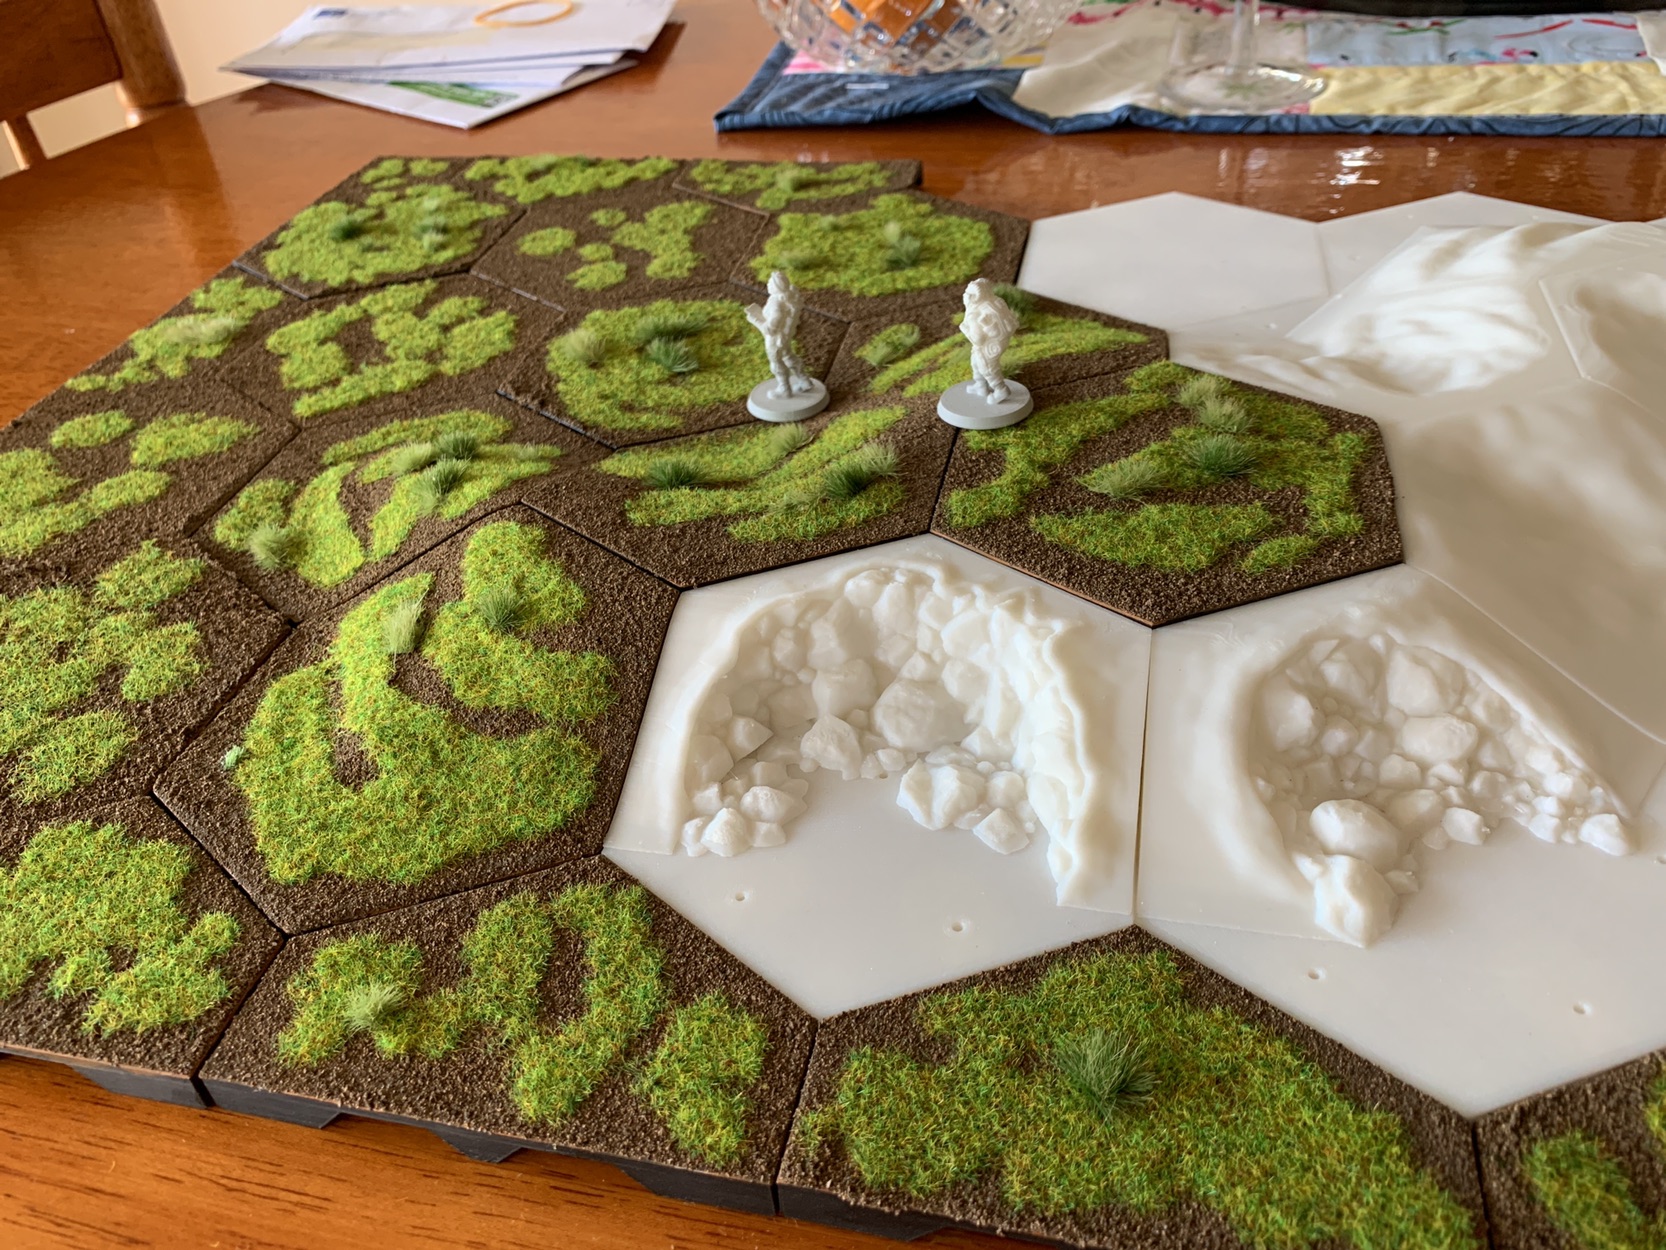
Add-on: Hill Slopes
The Hill Slope add-on elements are designed to create a gentile natural slope from the base hex ground level up 2cm to the top of the hill hex tile. Each of the add-on elements is named for the number of top level straight edges the add-on has, plus a Design letter. So for example add-on-2B.stl is two top level edges of Design B.

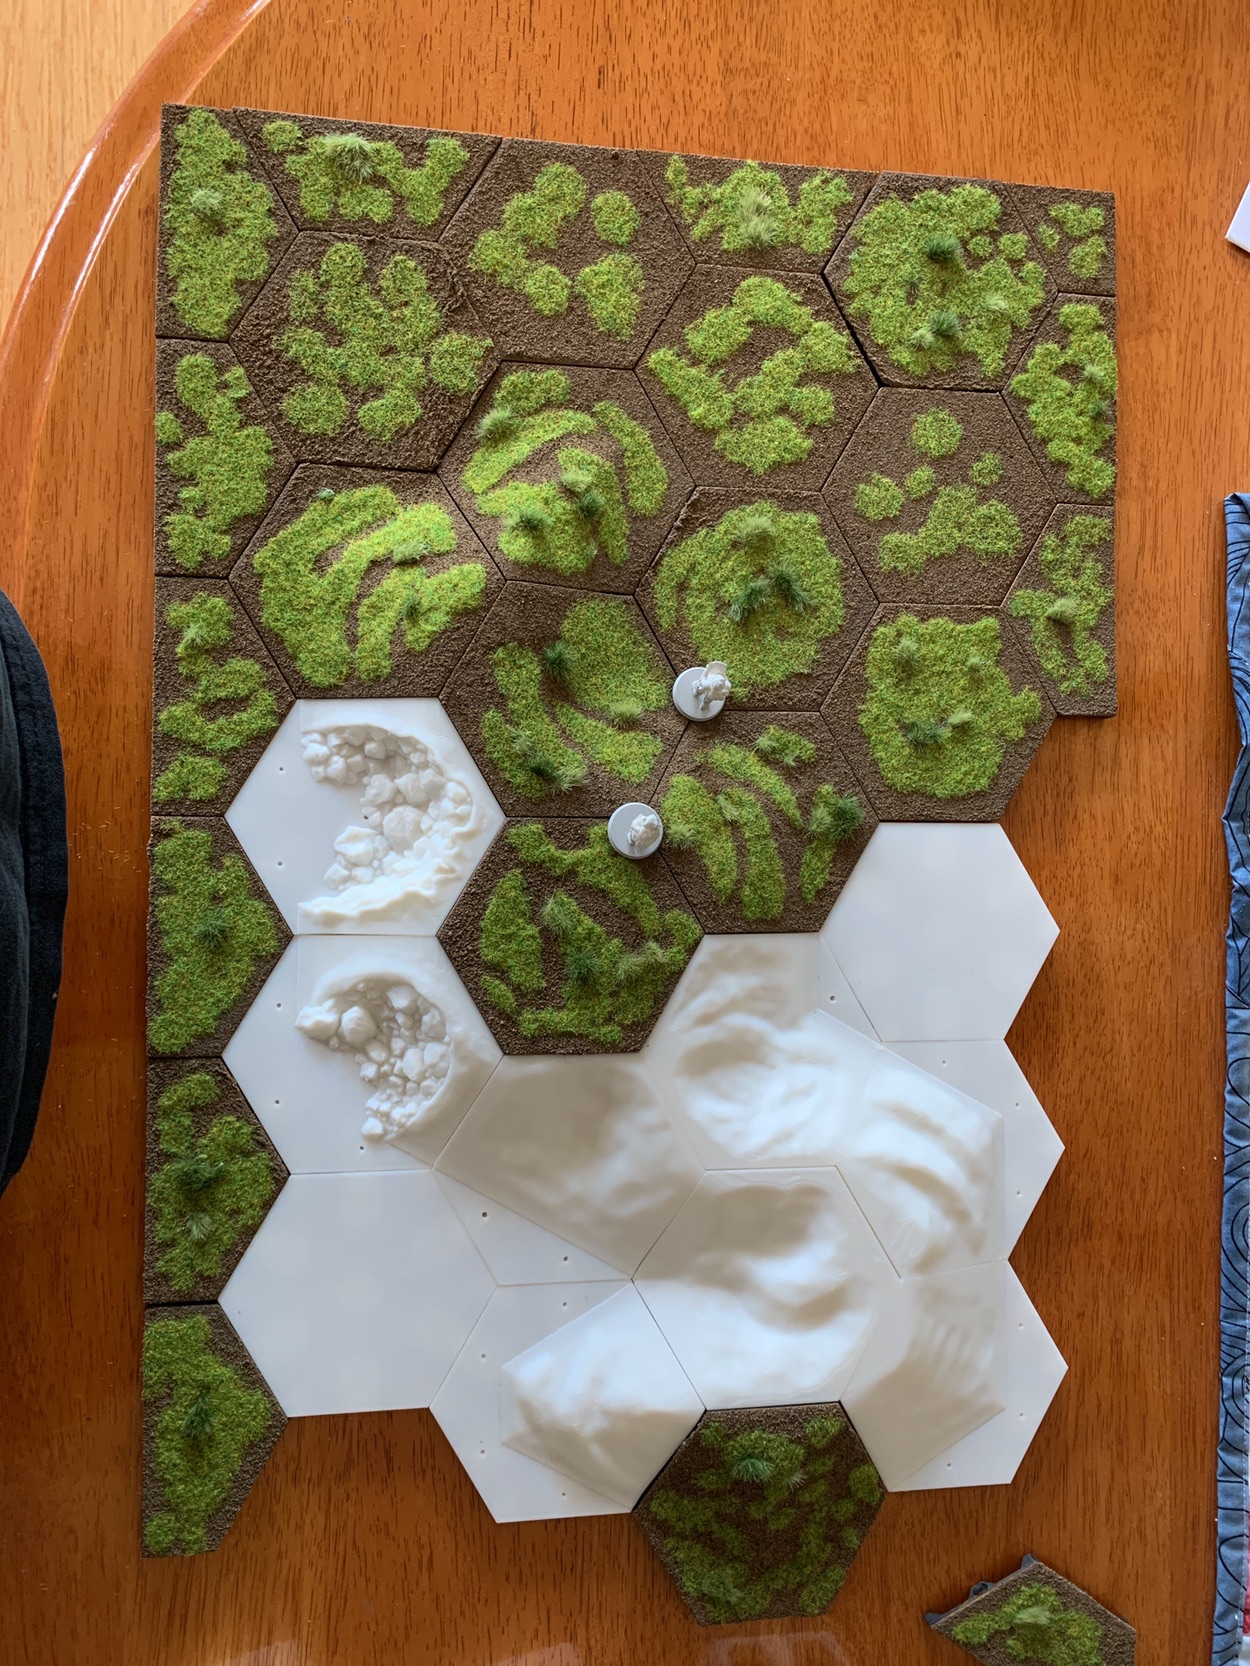
Stream Tiles
There are three main stream tile designs, each listed as design A, B, and C. A is a straight section, B is a bent section, and C is a tight bend in the river/stream. Each design consists of different sculpts with a sculpt number, eg: A2, is design A (straight) sculpt 2.
The stream tiles are designed with painting, the adding of static grass, and then the addition of water resin effects for water.

Add-on: Rubble/Cliff
This add-on is designed to look like a section of hill has subsided or eroded to display a section of rubble and stones. The file name for these add-on pieces include numbers and letters. The letter denote different designs while the number denotes the number of straight edges the piece has. For example the piece displayed above would be A2 for Design A with two edges. While the design below would be B1 for design B with 1 edge.

Designed for FDM 3D Printing
This terrain collection has been designed for Fused Deposition Modelling (FDM) 3D Printers. In fact we printed all of our test pieces on an Ender 3 printer. The majority of pieces are printed at a resolution of 0.1mm. Although we do up the resolution to 0.08mm for feature pieces.
The majority of pieces are designed for printing with the largest flat surface being face down on the printer bed. This results in the basic hex tile being printed upside-down, while the add-on elements are printed right side up.
You can print this terrain via Stereolithography Apparatus (SLA) printers such as a Elegoo Mars Pro, there is no reason why you can’t. We just don’t have one to test on.
Finishing Touches
This set of terrain is being designed with the idea that each tile will be finished with grass and dirt finishing akin to that seen in model train or tabletop war-game terrain models. Thus there is no modeling or grass or a lot of dirt surfaces. Large objects such as large stones, wood beams, and brick objects will be modeled. But it is expected that most ground surfaces will be finished with static grass or a gravel mix.

Access the Project Files
The STL files for the printable models are available to download via the Studio Dungeon Art Assets Browser. The Studio Dungeon is a members only area for Studio WyldFurr supporters on Patreon.
Test Print Photo Gallery
As the project progresses I am printing a copy of each element to make certain each tile prints correctly and looks like. Each tile will get a paint job along with grass flock. I will upload photos here with a little blurb about each element as it is completed.
Mini-terrain System
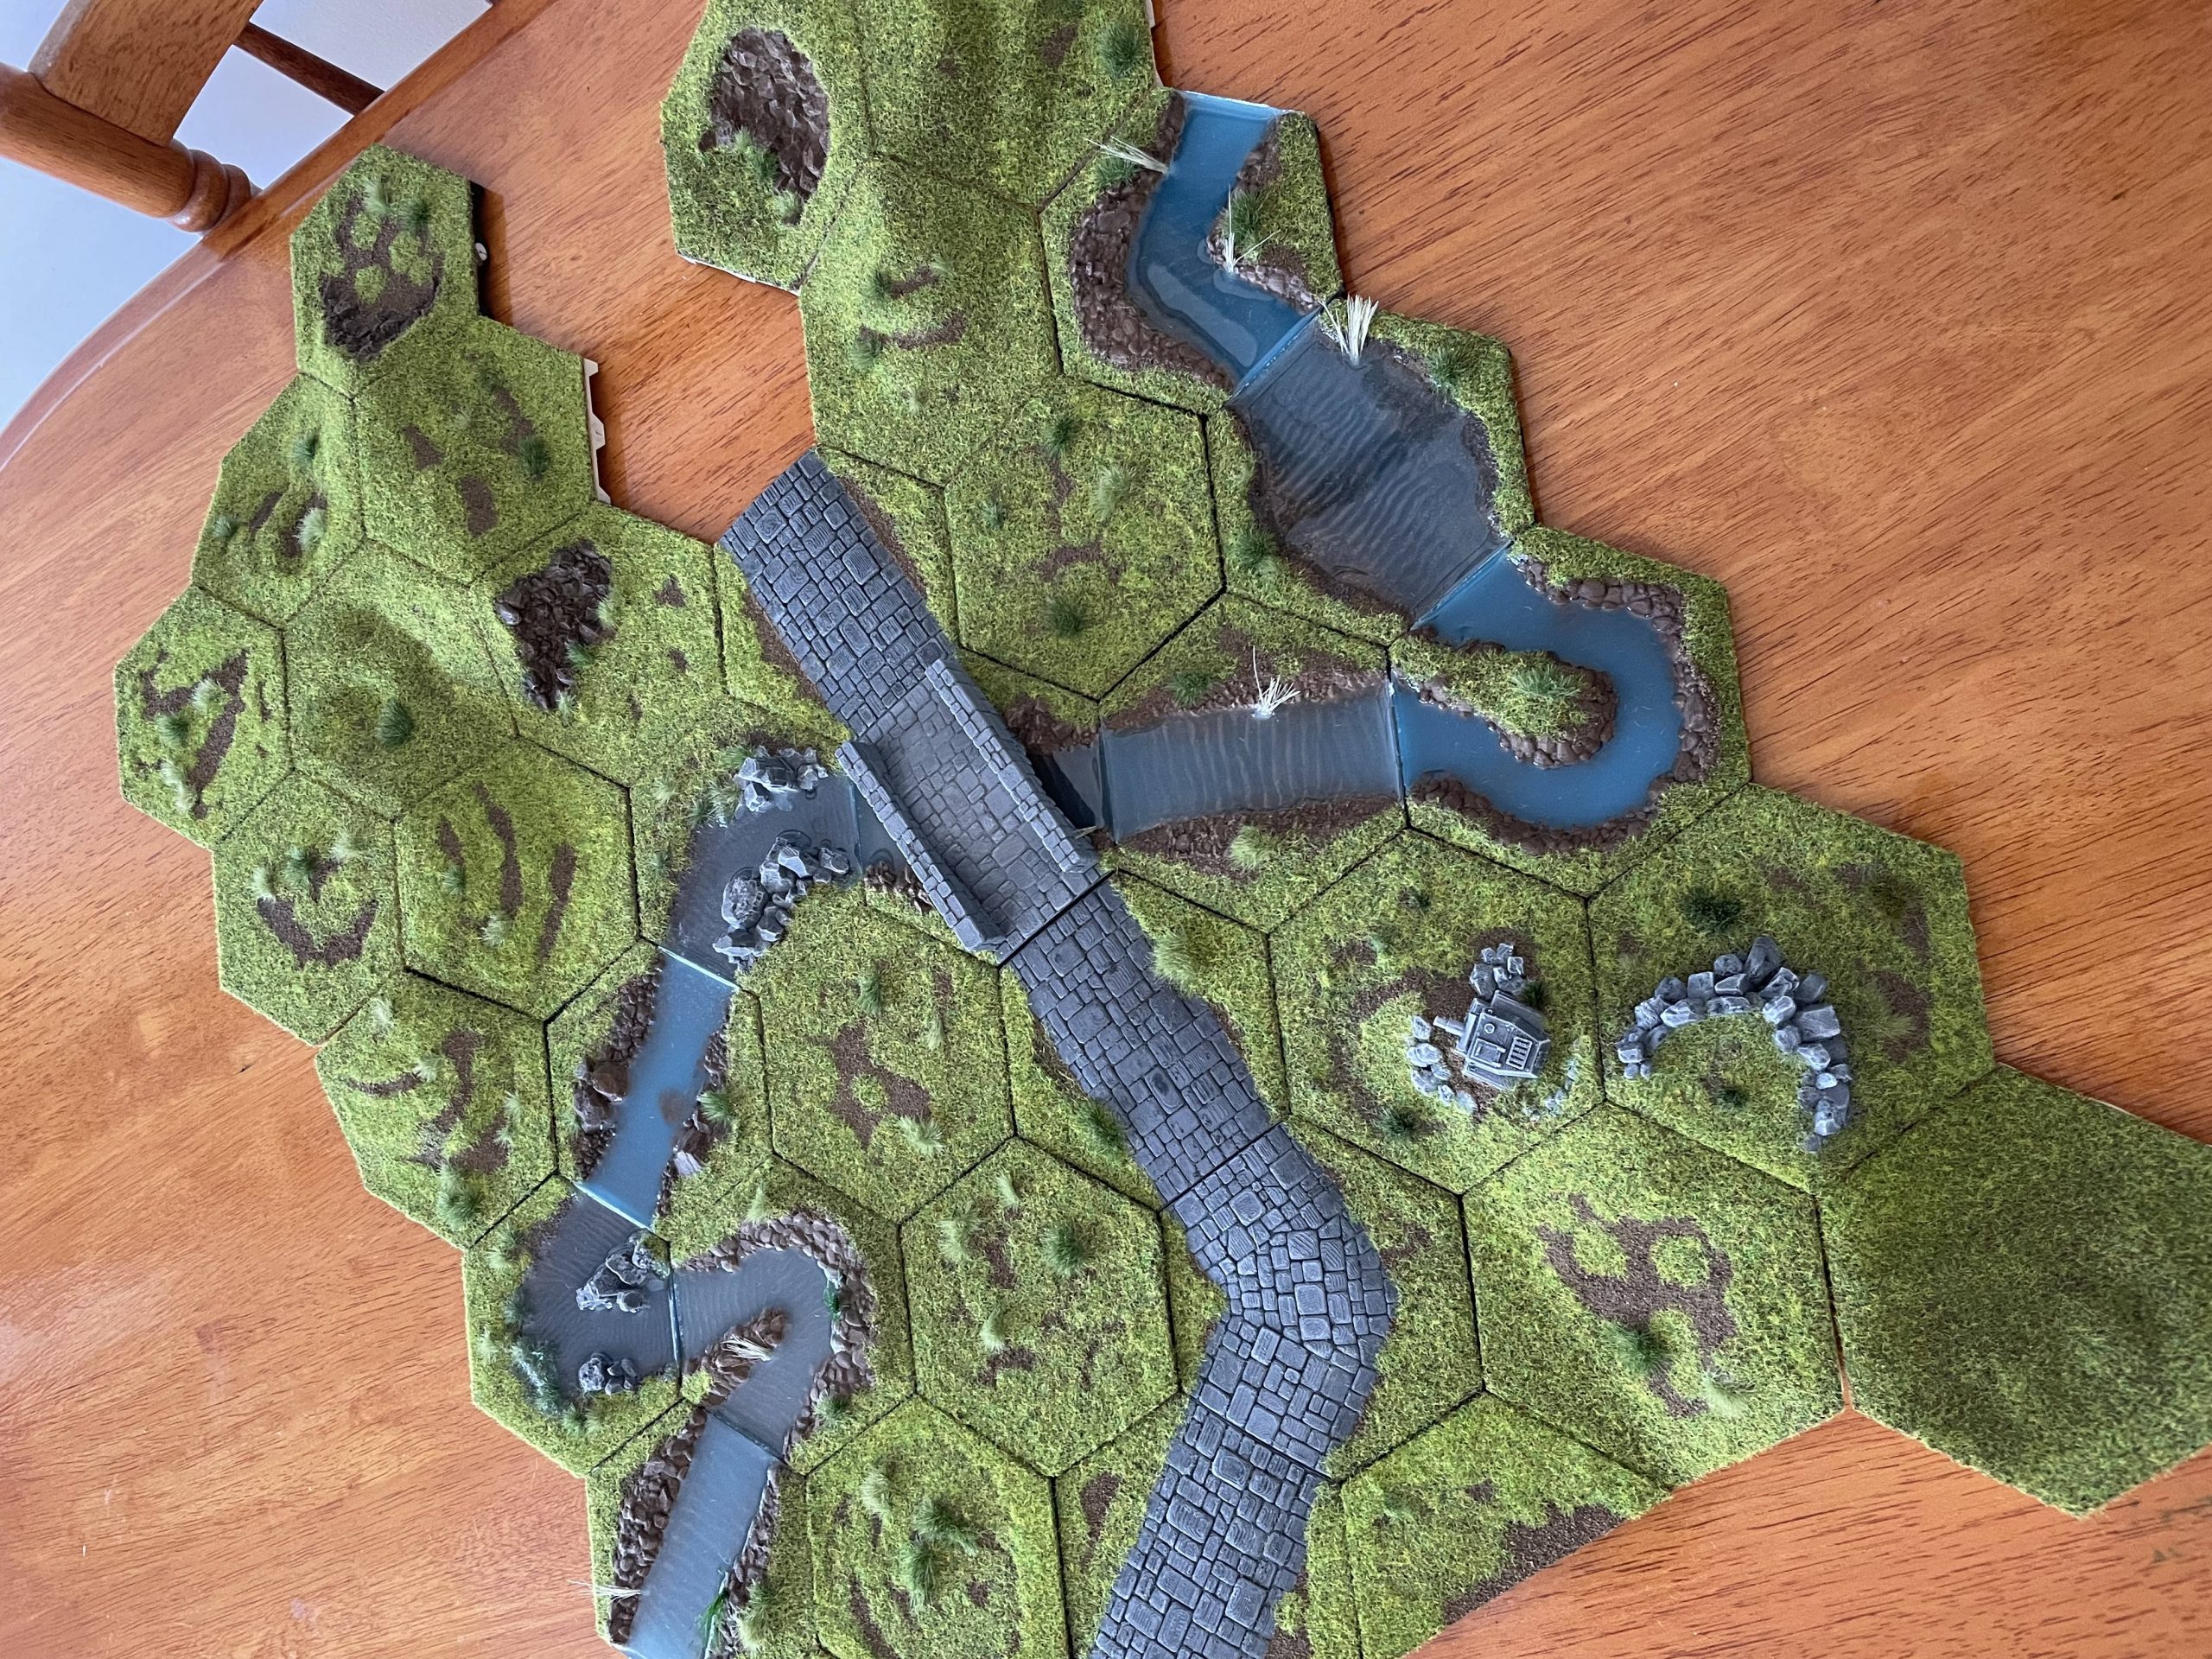
A view from above of a bunch of completed tiles put together.

Mini-terrain System
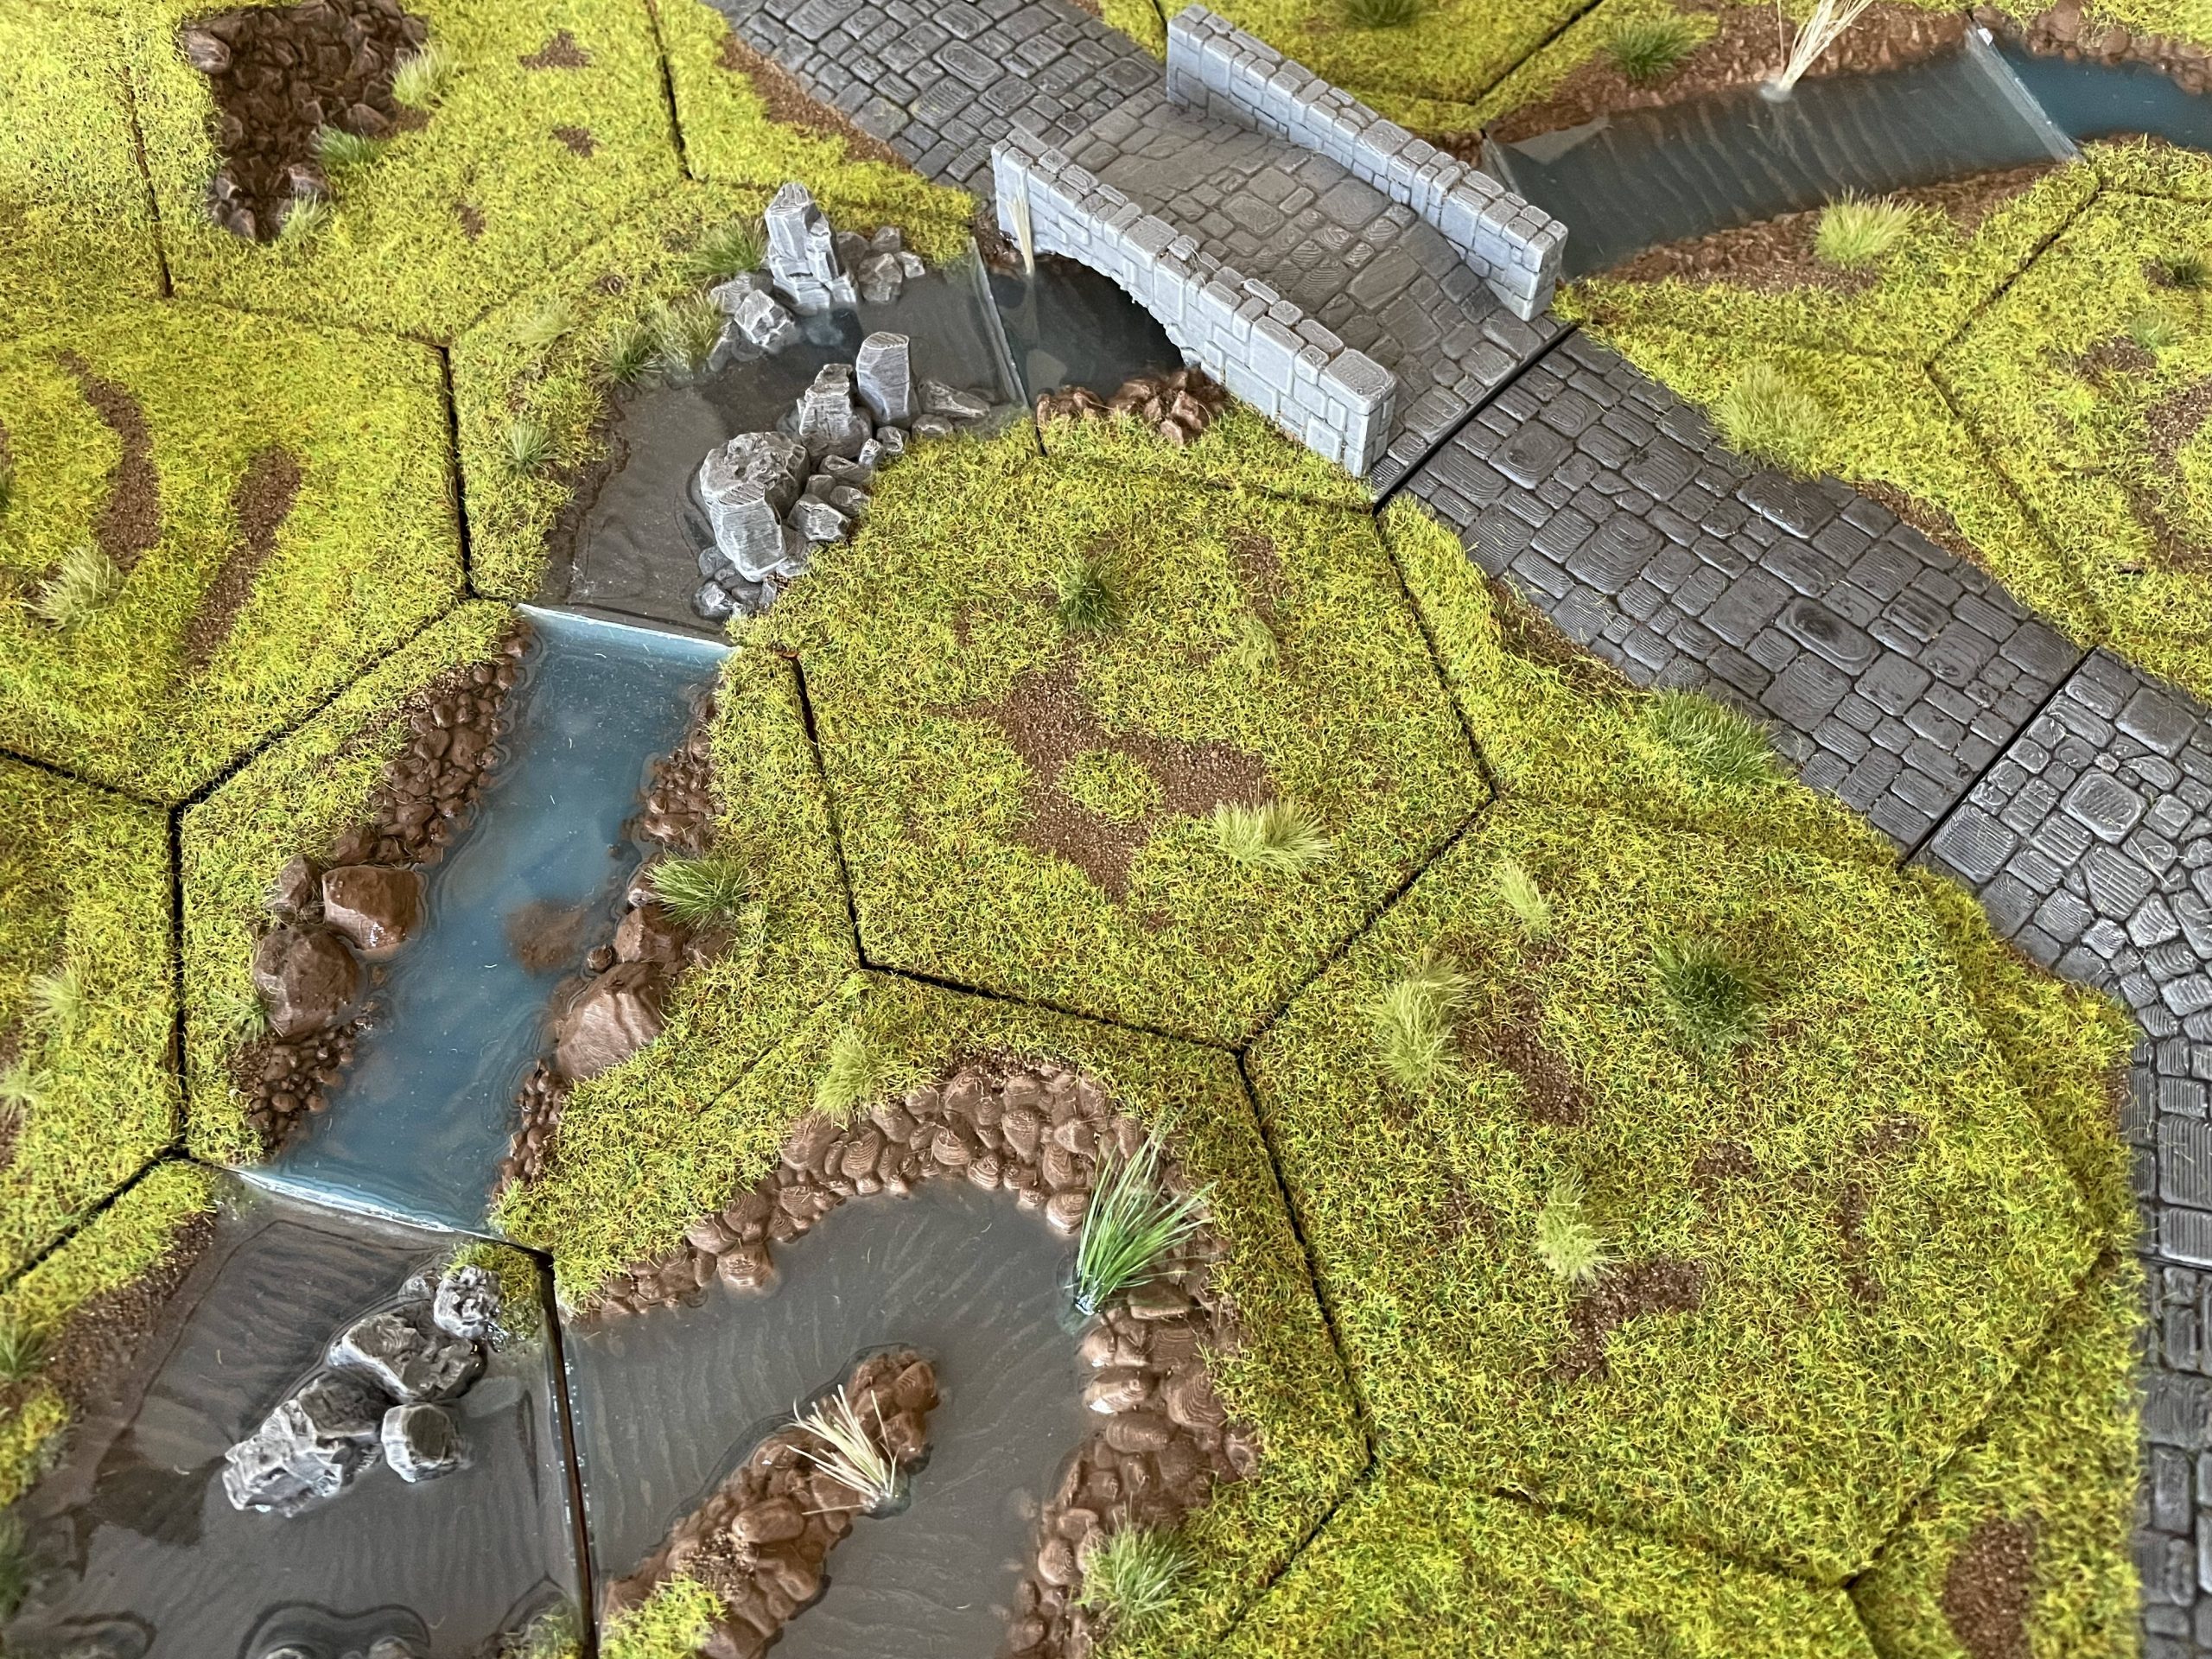
A view of how the river tiles meet up with the bridge tile.
Mini-terrain System
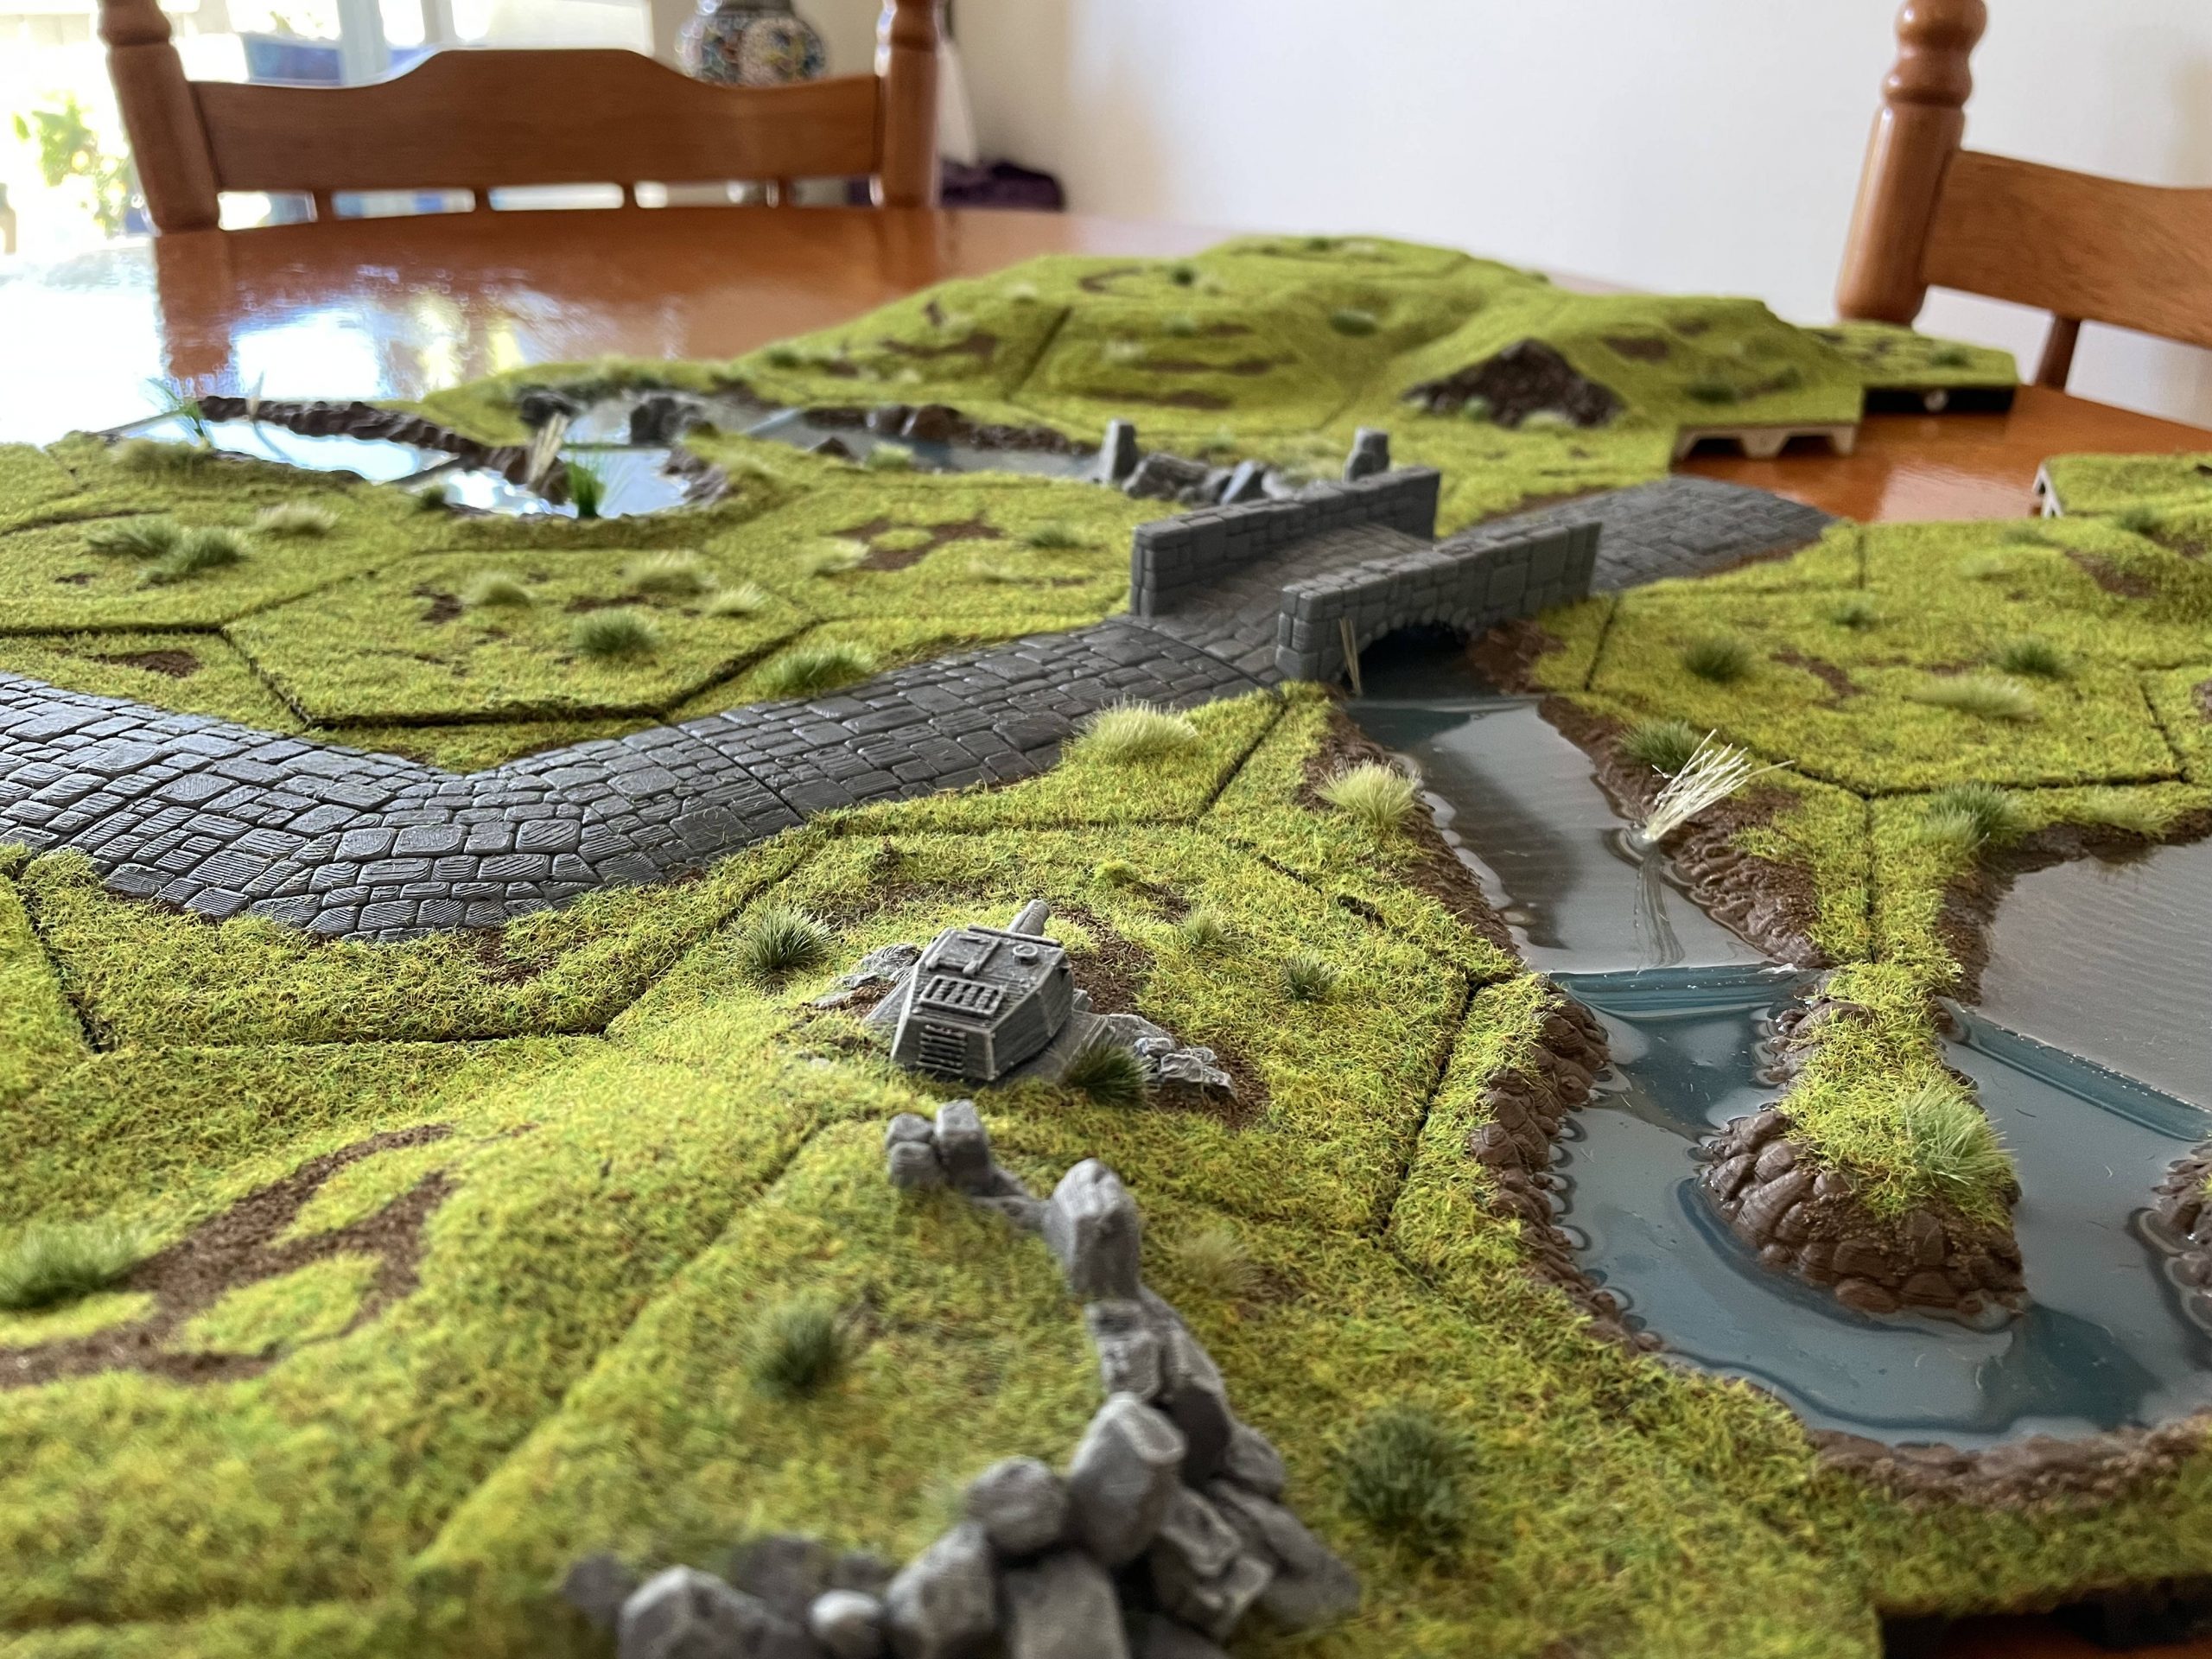
A view of a battlefield ready for playing on.
Mini-terrain System
A collection of completed tiles, with river tiles with blue tinted resin added.
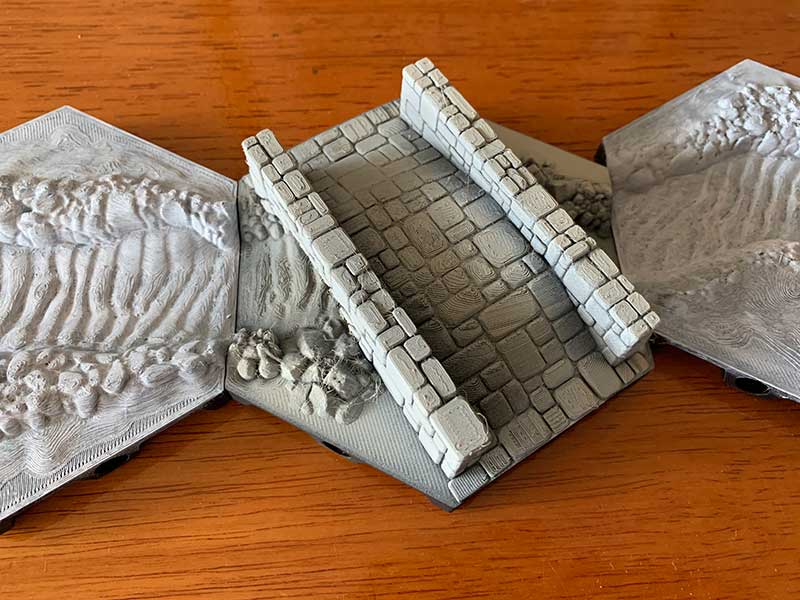
Mini-Terrain System: Bridge
This feature item consists of a bridge and a stream hex tile.
Mini-Terrain System: New Rubble/Cliffs
New tiles added to the set, with rubble/cliff sections.
Mini-Terrain System: New Rubble/Cliffs
A photo to display the scale of the tiles compared to a 25mm RPG model.
Mini-Terrain System: New Rubble/Cliffs
A selection of brand new tiles with freshly glued on add-on hill elements.
Mini-Terrain System: Overview
Printed some more tiles that need to be undercoated and painted.
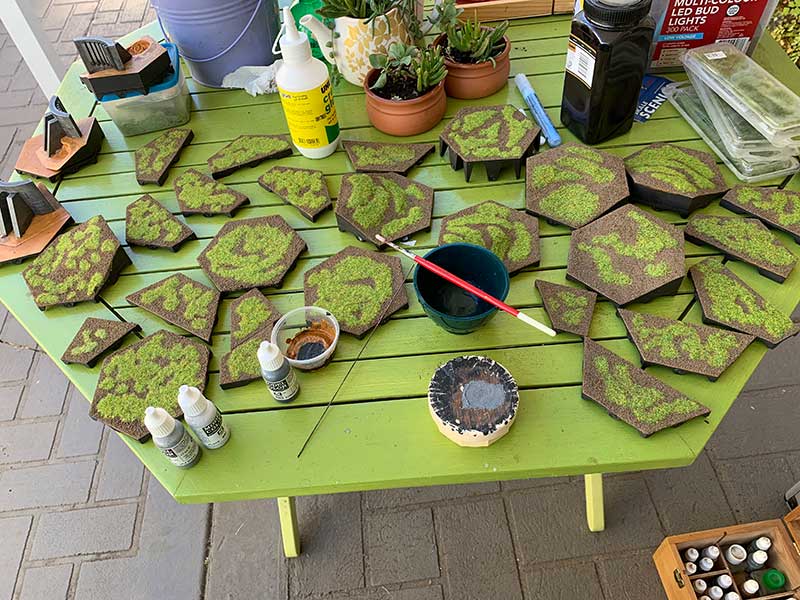
Mini-Terrain System: Adding the Grass
At this stage we are adding the patchy grass to the dirt layer. The static grass will be complemented with added longer grass features.
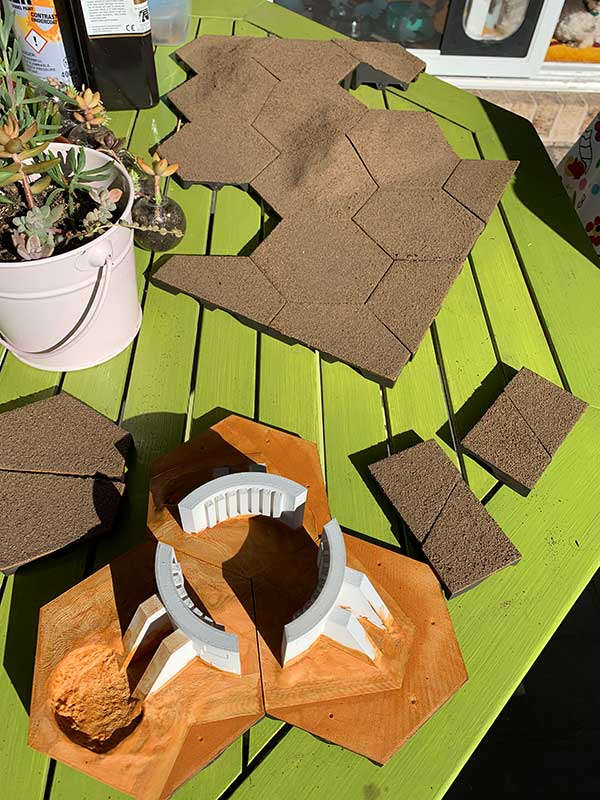
Mini-Terrain System: Alien Power Core
Here are the three Alien Power core tiles with the base coats of paint applied. The LED light up elements are yet to be printed at this stage.
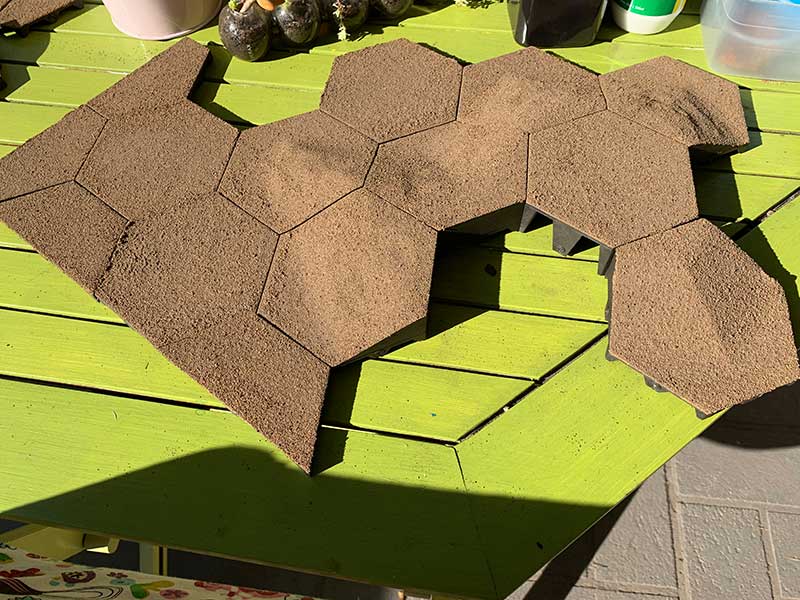
Mini-Terrain System: Dirt Layer
A collection of tiles with the “dirt” layer added for the ground layer of each hex. This photo also displays how each hex fits together.
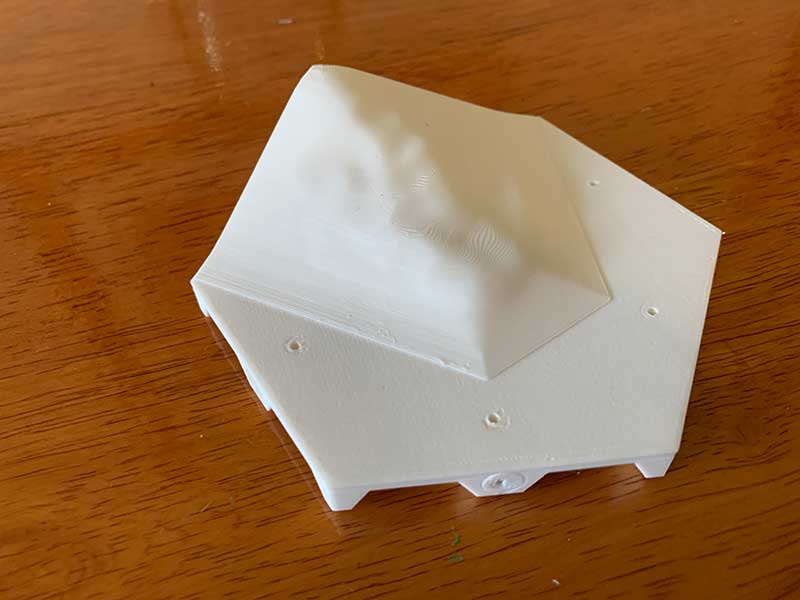
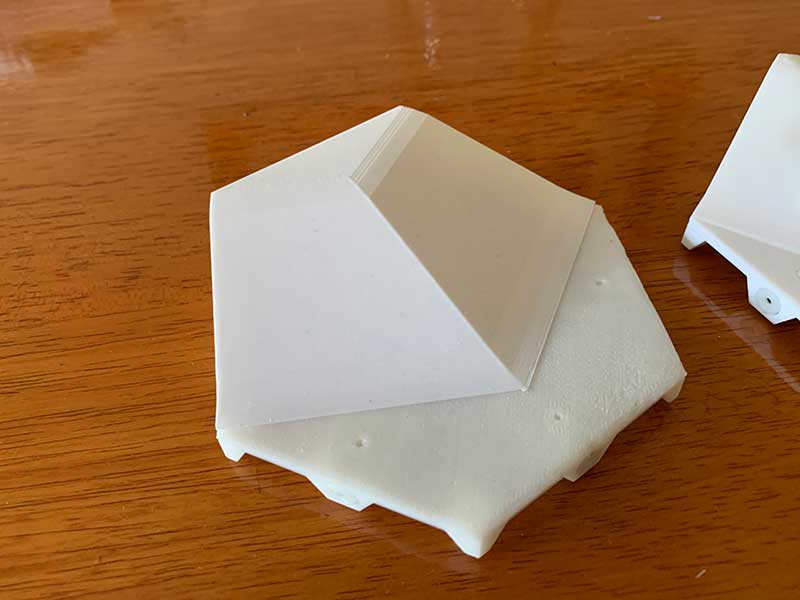
Mini-Terrain System: Hex plus Add-on
Here is a basic hex tile with the Add-on Slope 0 element glued to it.
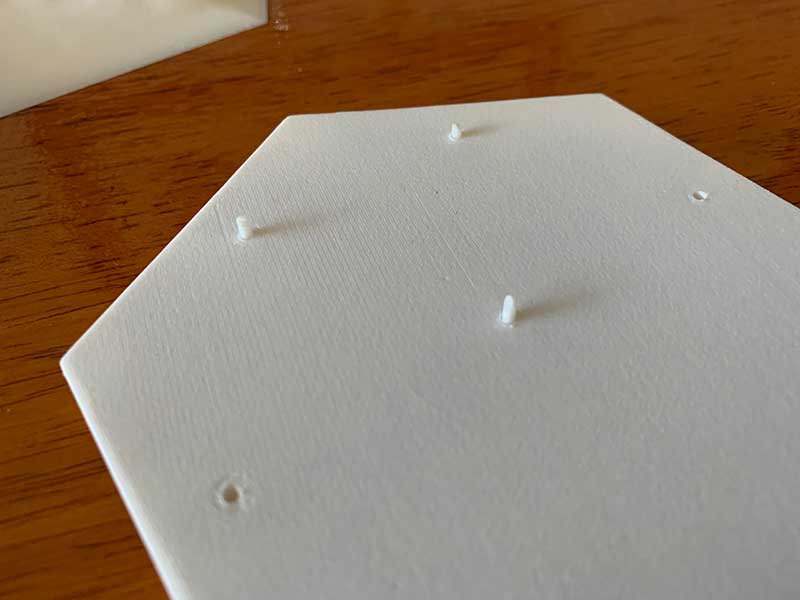
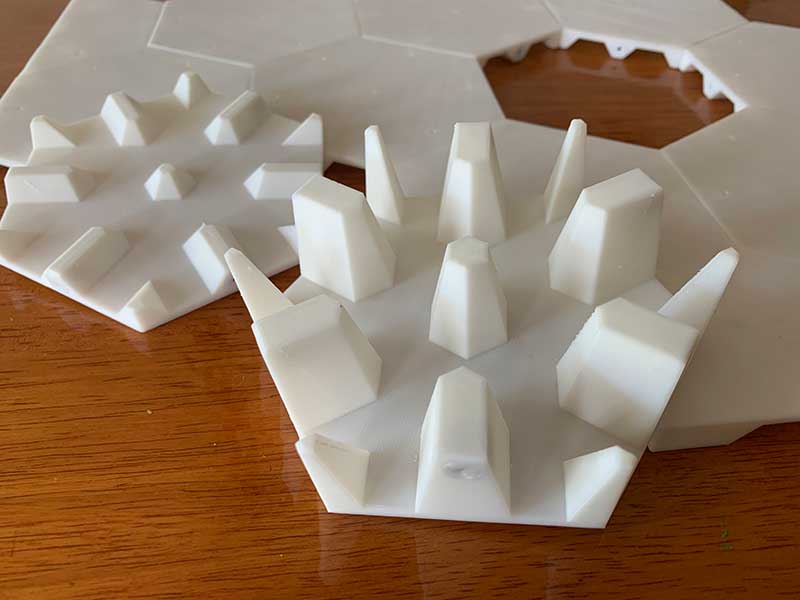
Mini-Terrain System: Alignment Pins
The holes in the basic hex tile and the add-on elements are for inserting alignment pins made from leftover filament.
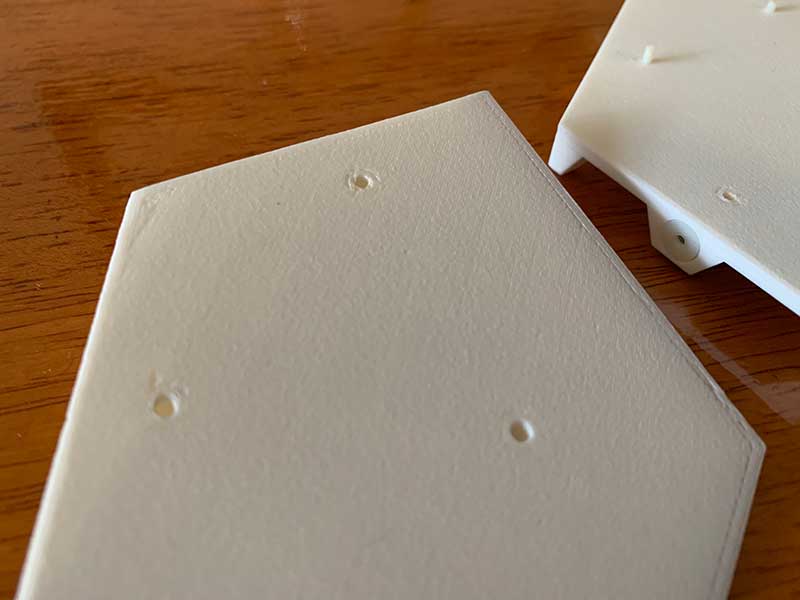
Mini-Terrain System: Alignment Peg Holes
The holes in the basic hex tile and the add-on elements are for inserting alignment pins made from leftover filament.
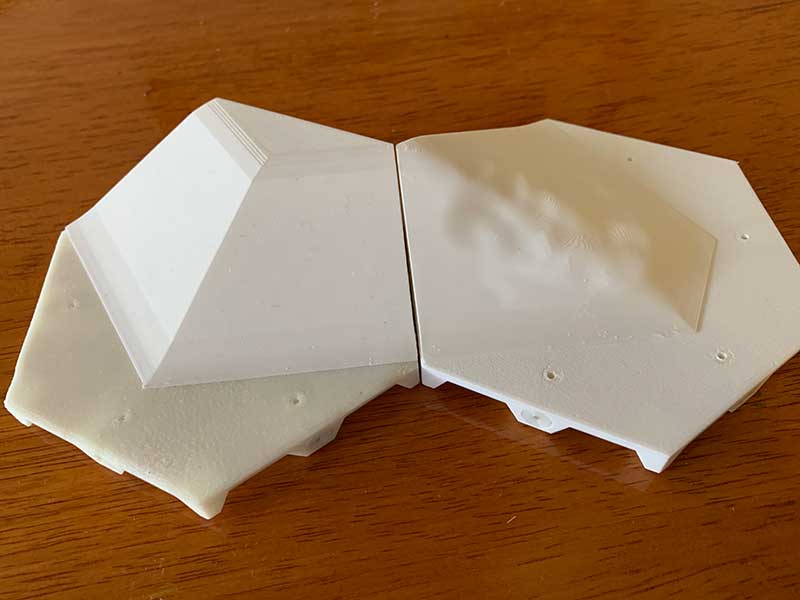
Mini-Terrain System
An add-on with no sculpting and a basic sculpted add-on piece.
Mini-Terrain system: Basic Add-on
Here we see an add-on element with no sculpting. This was a proof of concept element.
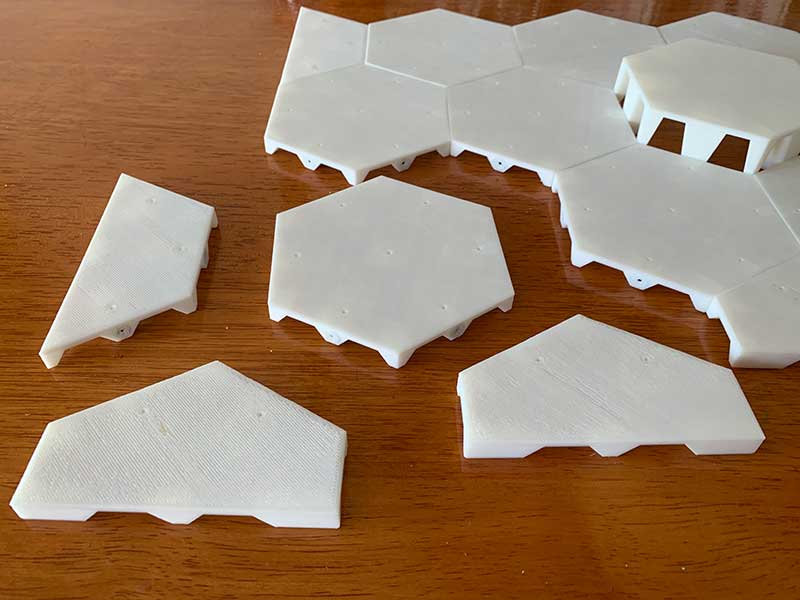
Mini-Terrain System: Edge elements
There are half tiles to enable to creation of a straight edge to an assembled game board.
Mini-Terrain System: Underside
The under side of each basic hex tile consists of little support feet that also house the 5mm ball magnets. Small plugs seal the magnet sockets.

Mini-Terrain System: Basic Hex Tile
The main element is the basic tile, onto which add-on element can be glued. 5mm ball magnets in each side help hold the set together.
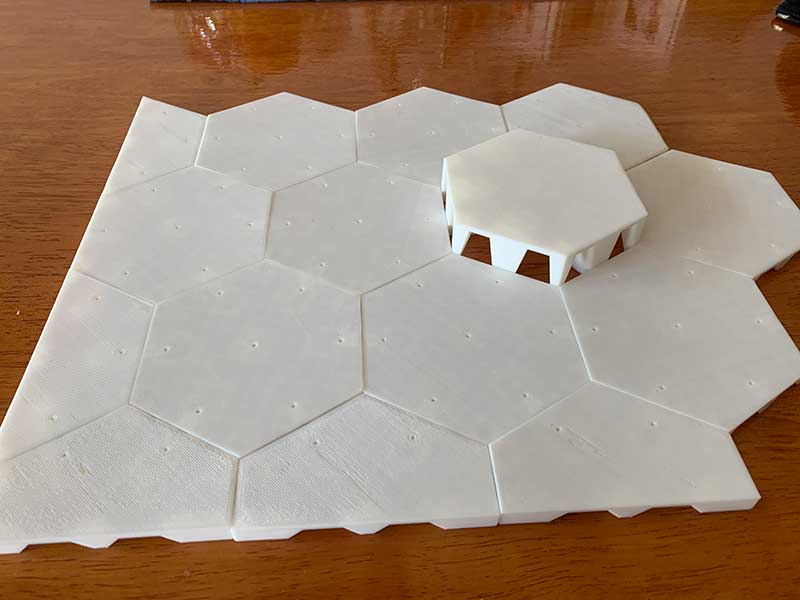
Mini-Terrain System: Example Layout
This is a group of tiles laid down to display how the tiles fit together along with the edge elements.
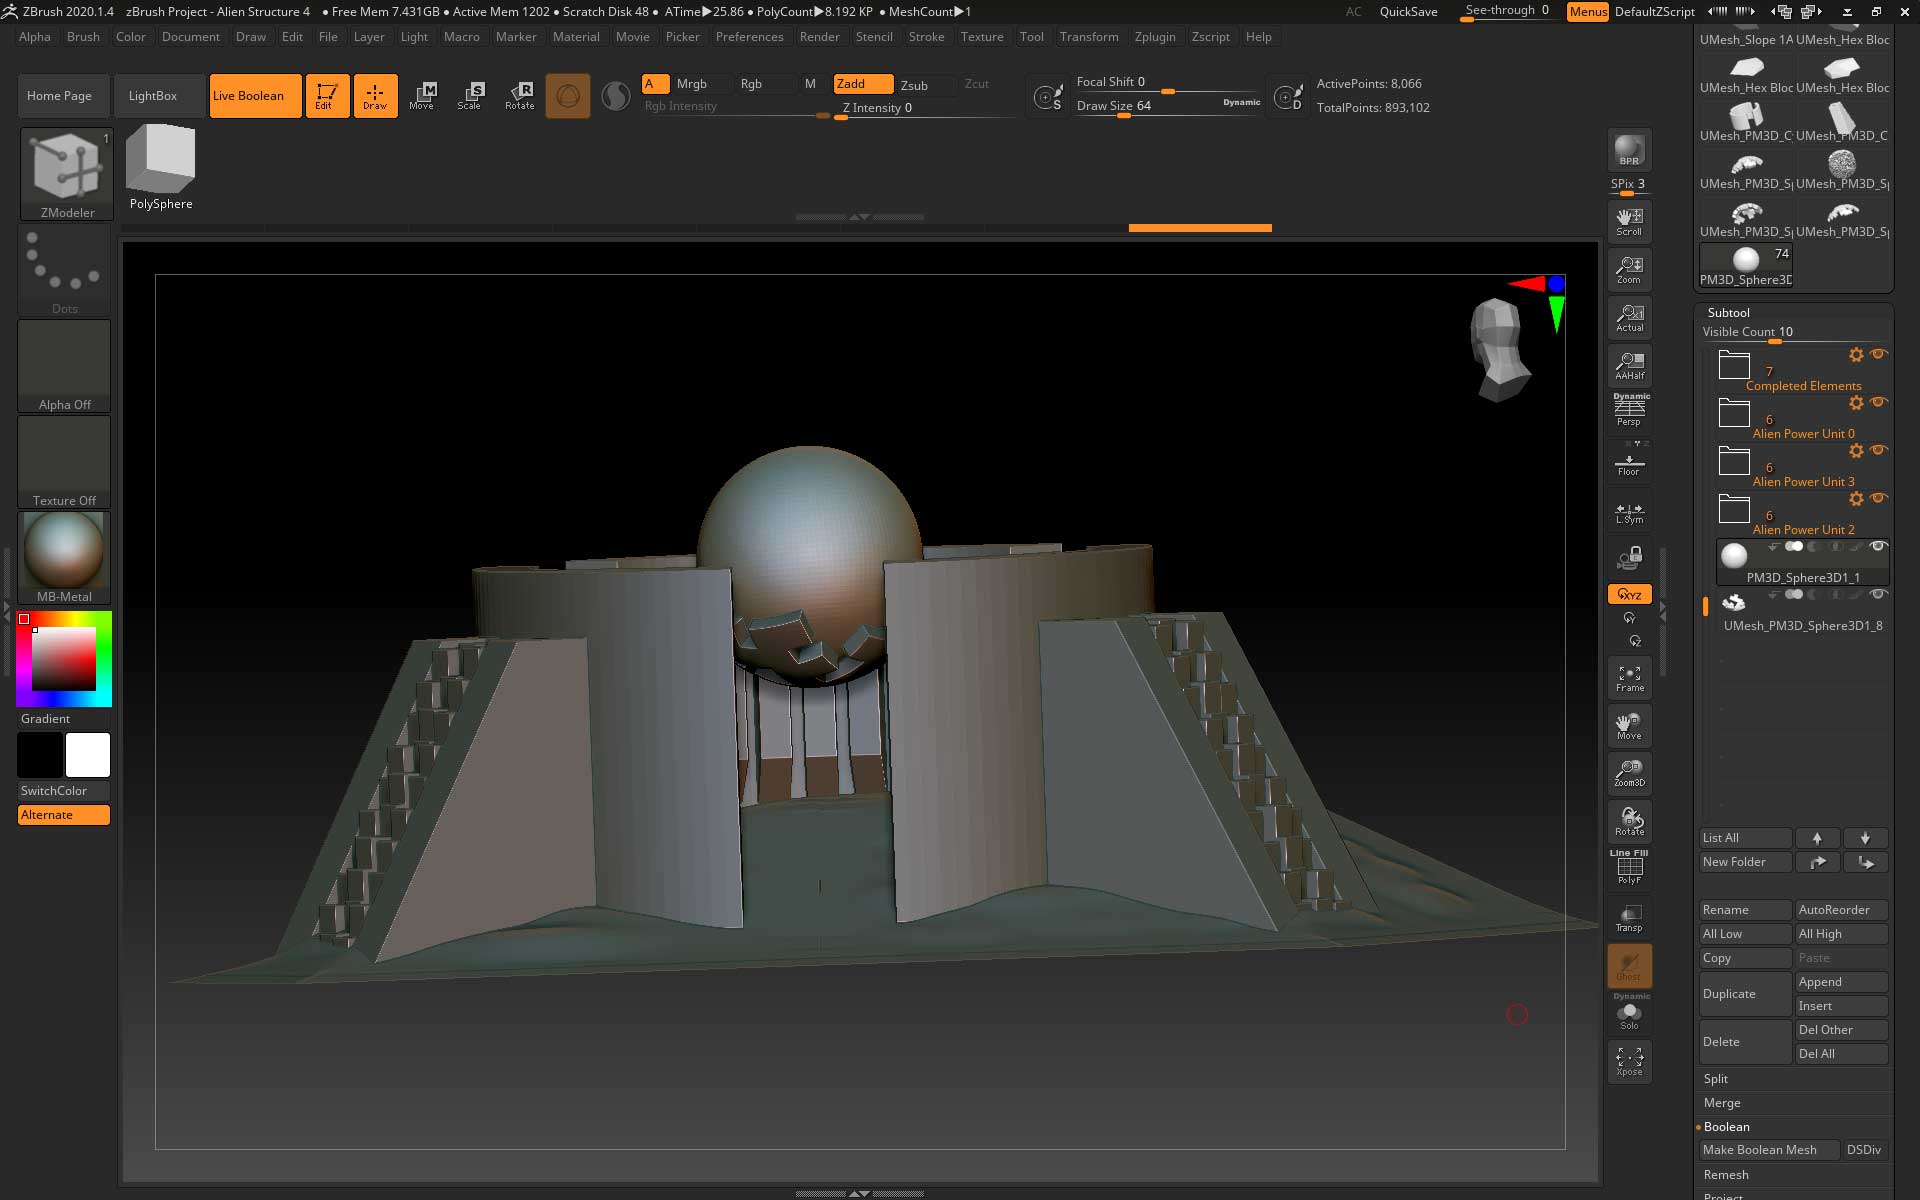
Mini-Terrain System: Alien Power Unit
Tailz is working on the design of an Alien power unit terrain piece.